
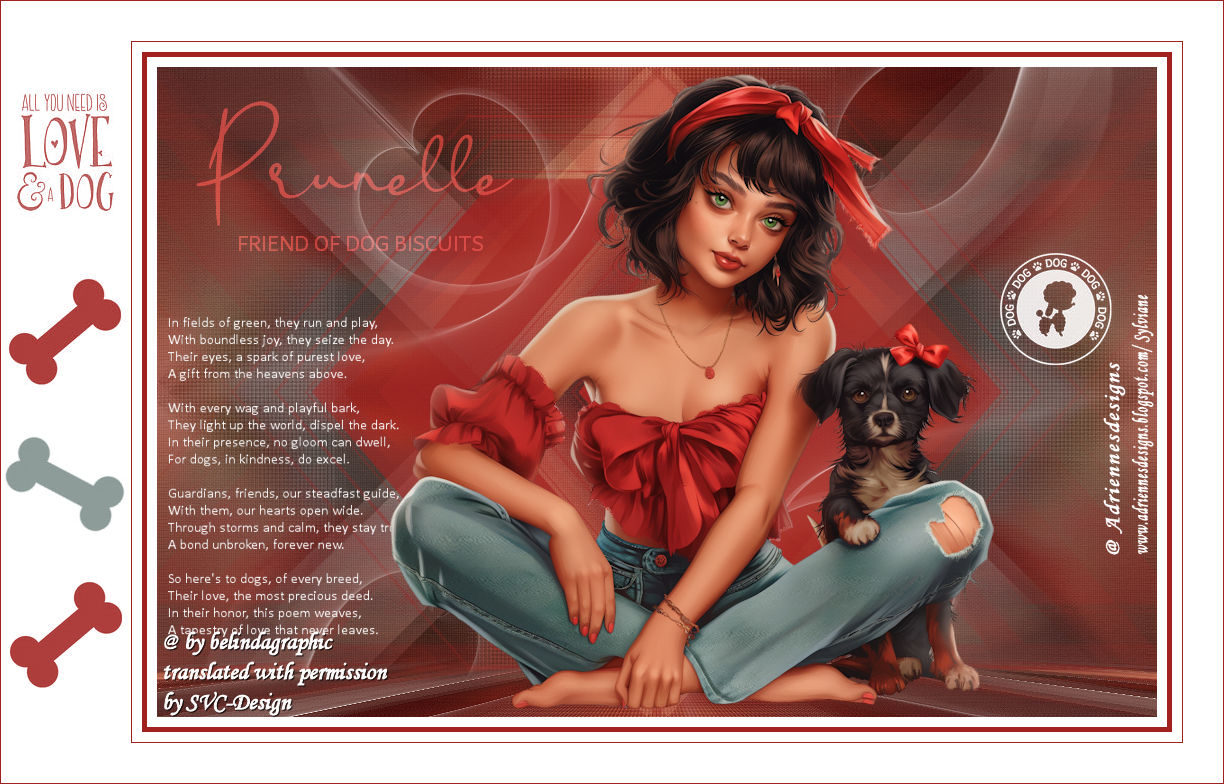
This lesson is made with PSPX9
But is good with other versions.
© by SvC-Design

Materialen Download :
Here
******************************************************************
Materials:
Calque-Alpha-Prunelle.pspimage
Prunelle-1.png
Prunelle-2.png
Prunelle-3.png
Prunelle-4-Cadre.png
selection1-Prunelle.PspSelection
selection2-Prunelle.PspSelection
Texte-Prunelle.png
WD-Prunelle.png
******************************************************************
Plugin:
Effects – plugin - Medhi - Wavy Lab.
Effects – plugin - Medhi - Sorting Tiles.
Effects – plugin - Simple - Top left Mirror.
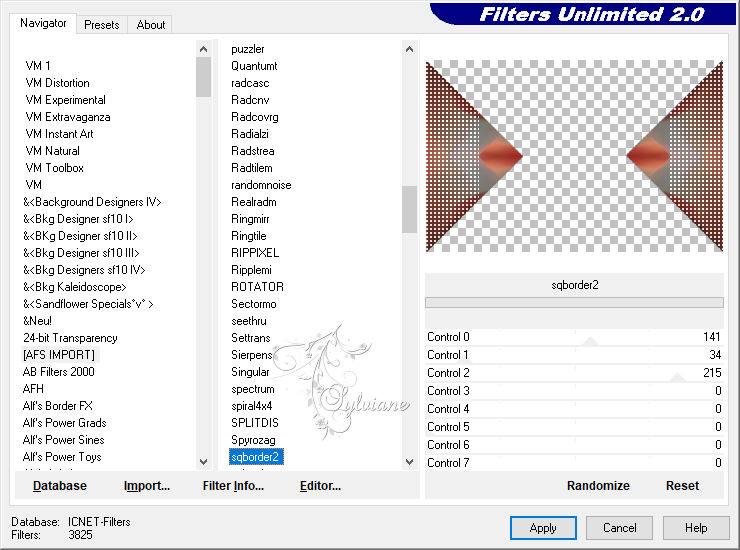
Effects – plugin – Unlimited 2.0 - AFS - Sqborder2.
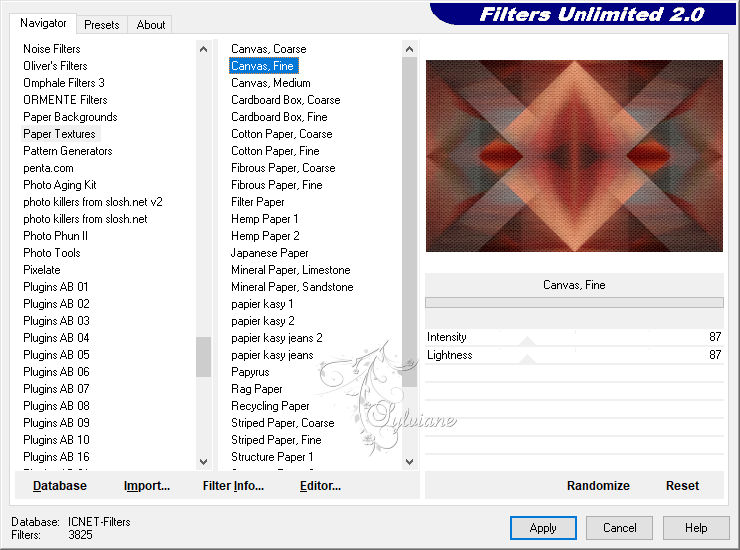
Effects – plugin - Unlimited 2 - Paper Textures - Canvas,fine.
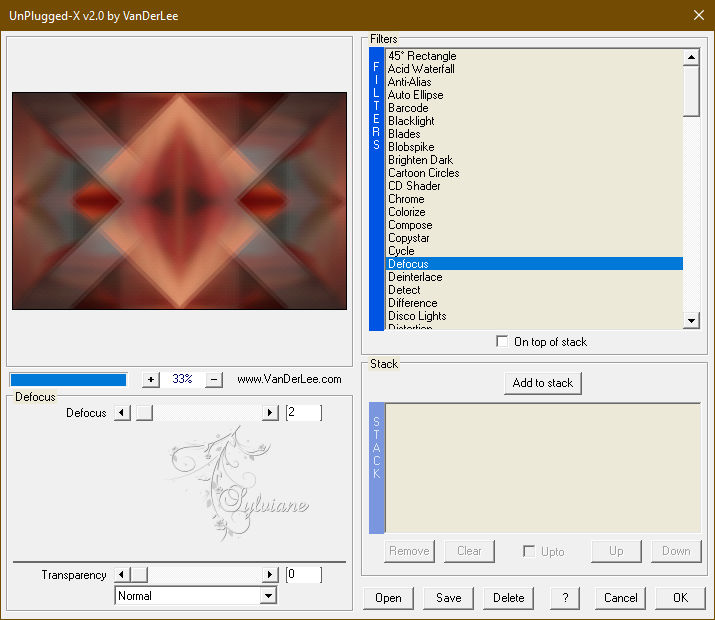
Effects – plugin - Vanderlee - Unplugged X - Defocus
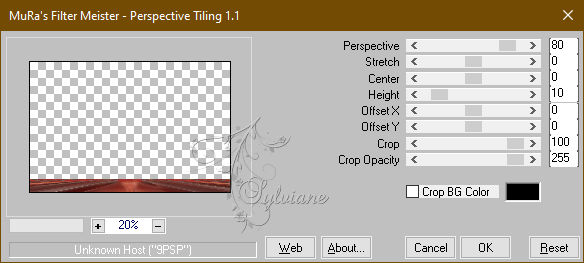
Effects – plugin - Mura's Meister - Perspective Tiling.
******************************************************************
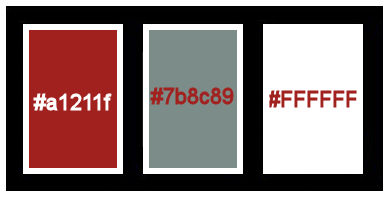
color palette
:
******************************************************************
methode
When using other tubes and colors, the mixing mode and / or layer coverage may differ
******************************************************************
General Preparations:
First install your filters for your PSP!
Masks: Save to your mask folder in PSP, unless noted otherwise
Texture & Pattern: Save to your Texture Folder in PSP
Selections: Save to your folder Selections in PSP
Open your tubes in PSP
******************************************************************
We will start - Have fun!
Remember to save your work on a regular basis
******************************************************************
Foreground :#a1211f
Background :#7b8c89
Color 3 :#ffffff
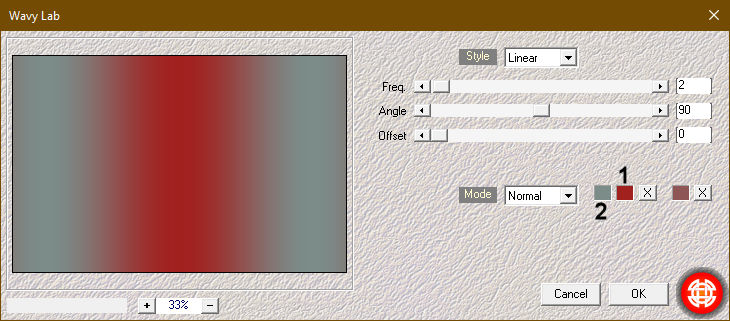
1.
Open Calque-Alpha-Prunelle.pspimage
Window - duplicate
Minimize the original - we are working on the copy
Effects – plugin - Medhi - Wavy Lab.
Selections - Select all.
2.
Open main tube
Edit - Copy.
Edit - Paste into selection.
Effects - Image Effects - Seamless Tiling - Default
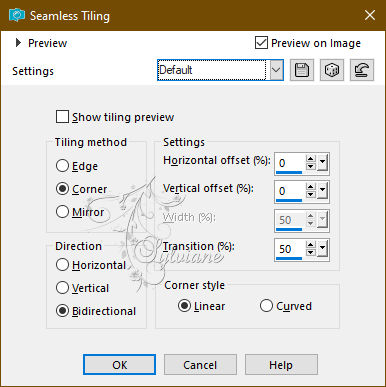
Selection - Select None
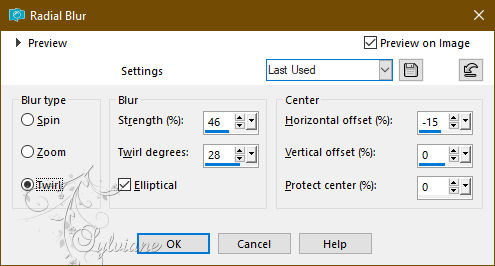
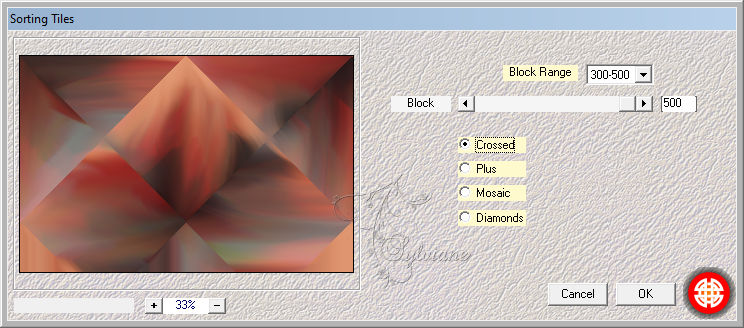
3.
Adjust - blur - radial blur
Effects – plugin - Medhi - Sorting Tiles.
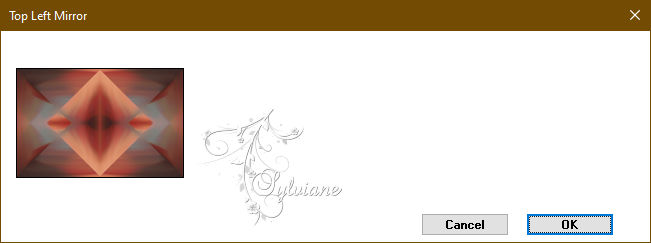
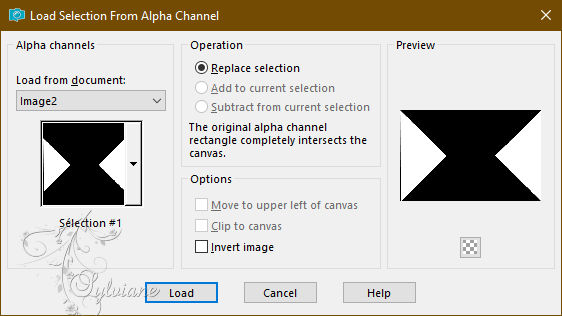
4.
Effects – plugin - Simple - Top left Mirror.
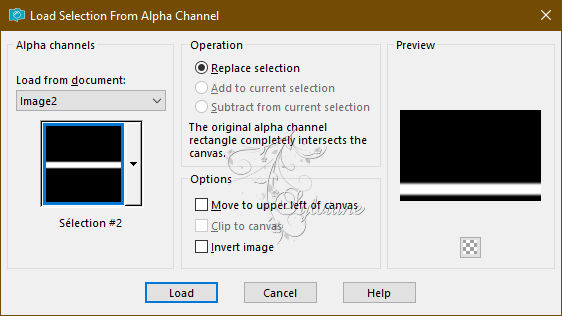
Selections - Load/Save selection - From Alpha channel - Load selection#1.
Selections – Promote selections to layer
KEEP SELECTED .
5.
Effects – plugin – Unlimited 2.0 - AFS - Sqborder2.
Selection - Select None
Effects - Image Effects - Seamless Tiling - Default
blending mode: Multiply.
Layers - Merge - Merge visible layers
6.
Effects – plugin - Unlimited 2 - Paper Textures - Canvas,fine.
7.
Effects – plugin - Vanderlee - Unplugged X - Defocus.
8.
Open Prunelle-1.png
Edit - Copy.
Edit - Paste as new layer.
It's in place.
9.
Open Prunelle-2.png
Edit - Copy.
Edit - Paste as new layer.
blend mode: Screen.
Opacity: 71%.
Layers - Merge - Merge visible layers
Layers - Duplicate.
10.
Effects – plugin - Mura's Meister - Perspective Tiling.
Stay on this layer.
11.
Selections - Load/Save selection - From Alpha channel - Load selection#2.
Edit - Cut or keyboard Delete key.
Selection - Select None
Adjust – scharpness – scharpen
12.
Open WD-Prunelle.png
Edit - Copy.
Edit - Paste as new layer.
Activate selection tool (Press K on your keyboard)
And enter the following parameters:
Pos X : 39 – Pos Y : 34
Press M.
blend mode: Screen.
13.
Open your main tube
Edit - Copy.
Edit - Paste as new layer.
Image - Resize ( if necessary.), and add a drop shadow.
Activate selection tool (Press K on your keyboard)
And enter the following parameters:
Pos X : 232 – Pos Y : 7
14.
Open Texte-Prunelle.png
Edit - Copy.
Edit - Paste as new layer.
Activate selection tool (Press K on your keyboard)
And enter the following parameters:
Pos X : 11 – Pos Y : 250
Press M.
Image - Resize this layer to 90%.
Layers – arrange – move down
15.
Open Prunelle-3.png
Edit - Copy.
Edit - Paste as new layer.
Activate selection tool (Press K on your keyboard)
And enter the following parameters:
Pos X : 839 – Pos Y : 184
Press M.
16.
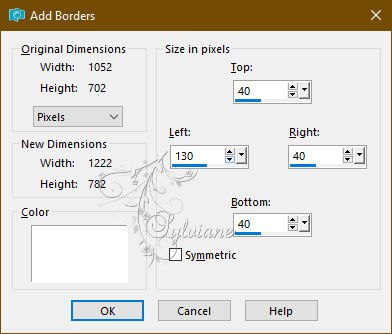
Image - Add Borders – Symmetric -10 pixel - color 3
Image - Add Borders – Symmetric -5-pixel - color 1
Image - Add Borders – Symmetric -10 pixel - color 3
Image - Add Borders – Symmetric -1 pixel - color 1
Image - Add borders - color 3
17.
Open Prunelle-4-Cadre.png
Edit -Copy.
Edit - Paste as new layer.
Position as shown.
Colorize as required.
18.
Add your signature on a new layer.
Image - Add Borders – Symmetric 1 pixel -color 1
Image - Resize to 950 pixels wide.
Save as JPEG
Back
Copyright Translation 2024 by SvC-Design
------------------------------------------------------------------------------
Thanks to all who created